Saturday, November 27, 2010

The First Sunday of Advent: Preparing the Way


People, look east. The time is near 

Of the crowning of the year.
Make your house fair as you are able,
Trim the hearth and set the table.
People, look east and sing today:
Love, the guest, is on the way.

Advent is a time of preparation.  We prepare for the coming of the Lord on Christmas Day.  The use of an Advent wreath is a tradition that goes back centuries and no one really knows how it began.

It symbolizes many things:
- The Greenery: Everlasting Life
- The Circle: Immortality of the soul and/or to represent that God has no beginning and no end
- The Candles: Christ, the light of the world
- The Central White Candle: (optional) Lit on Christmas Day to represent the coming of Christ

You can find out more about the history of the Advent wreath at the:
Catholic Education Resource Center.

Traditionally, a candle is lit during dinner every night for the four weeks leading up to Christmas.  The first week one candle is lit, the second two are lit, and so on.  Growing up, my family lit our Advent wreath after dinner for a short family prayer which usually included a reading from the Bible and perhaps a short reading from a special Advent prayer book for families.  Some years this was done at the kitchen table after the dishes had been cleared, other years we kept the wreath on our coffee table and would circle around it in the living room.


Our wreath is simple, small, and was a minor financial investment.  Just a metal taper ring, set of candles, and a little plastic wreath... the "wreath" is actually a surround for a pillar candle that is easily found in any craft store floral department.  I like the fact that since it is small, I can keep it stored in my kitchen cabinet and not in the attic with our other Christmas decorations.  It is easy to take out as soon as we need it.  I do not remember where I got this set of advent candles, though I am glad to have them because our old set was stored in the attic and melted!  No more storing candles in a hot Texas attic for me.

Looking for an Advent wreath or candles?  Here are a few I found online:
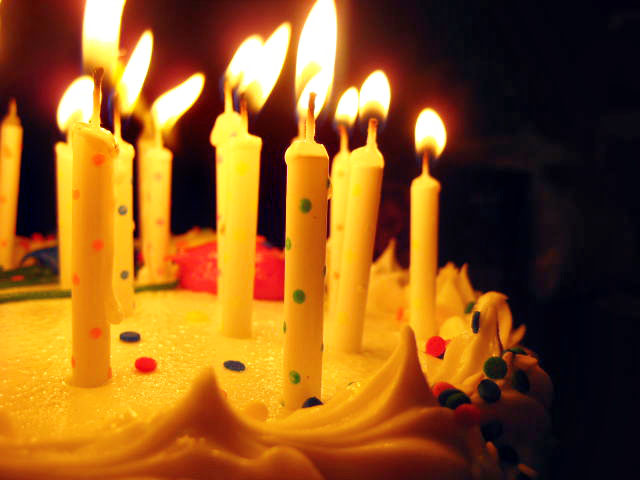
On Catholic Icing: Advent Wreath Craft for Kids (with birthday candles!)
On Catholic Supply: Various Wreaths, Candles, and Books
                                (one metal ring for only $2.95 until Monday!)
On The Catholic Company: Various Wreaths and Candles
On Amazon: 6.5" Gold Christmas Advent Wreath & Candles

I have always felt that when it comes to Advent wreaths, it is more important to focus on what it symbolizes - the coming of Christ - and not the wreath itself.  It is a tool to help us count the weeks, prepare our hearts, and prepare the way because Love, the guest, is on the way.

Happy Preparations

Friday, November 26, 2010

A Stocking for Helen


It is getting to be that time of year again, and I am planning Christmas!  The crafts, foods, and activities of the Christmas season are some of my favorites... especially the ones that involve cocoa and a warm fire.

This year my Knit While They Nap group on Ravelry decided to do a Christmas stocking KAL/CAL (knit-a-long/ crochet-a-long) and it was just the prefect thing for me because I have been wanting to make Helen her very own stocking.

I used the pattern for the Starflower-Hexagon motif by Julie Mnemosyne.  If interested you can view the details of the construction on my Ravelry project page.

Wednesday, November 24, 2010

Thankful for a Versatile Home

I admit that I am not good at "before" pictures... I always forget to take them until we already have the "after" ready to go.  My sweet husband has had the week off for Thanksgiving and took it upon himself to rearrange a little nook in our kitchen.  Very recently this nook was home to our "office" which now resides in our master bedroom... away from little hands that want to press buttons.  And now this space is our official play area - it unofficially was before... just the little one played with things that we didn't want her to touch!


After seeing what a nice little area this makes for our daughter, I am pleased to say we live in a very versatile home.  Over the four years we have made our home here, this nook has been a breakfast area, a computer room, a sitting area, and now a play area.  How nice it is to be able to transform your home to suit your needs with very little time or money.

I hope someday soon to set up Helen's play kitchen in this nook (it is on order with woodworker grandpa). I know that over the next few years this nook will serve us well, giving the little one a place near mommy to play.

Thursday, November 18, 2010

A Talk with Baking Instructor: Jessica Meyers

anadama bread
Photograph by: little blue hen


Yesterday, I had the pleasure of interviewing Jessica Meyers, one of the King Arthur Flour baking instructors who will be presenting the free demos in the North Texas area at the end of the month.  Having never really "interviewed" anyone before, I lucked out that she was friendly and personable!  


What will the average home-baker get out of these demos?

Based on information King Arthur Flour has gathered through it's website and baking hotline, many people seem to have a lot of anxiety about two things in baking: Pie Crusts and Yeast.  The demos (one about pies and the other about sweet yeast breads) will walk home-bakers and pros alike through the keys to overcoming these anxieties. Even though your grandmother made a big deal out of making sure the fat was cut into the pie crust "just right" and even though yeast is a living organism and you could possibly "kill it," Jessica says we shouldn't worry about that!

Yeast has been around for millions of years and is not as fragile as you think, and like all things pie crusts and yeast doughs just take practice to master.  In the sweet yeast bread session, the instructors teach a basic versatile dough recipe that utilizes yogurt. The demos will give you a first person look at what your doughs and crusts are supposed to look like at various stages, and really... the most difficult part of baking is learning how to wait.

Also, all you average home-bakers have the chance to win some pretty fabulous door prizes too!


What recommendations do you have for someone new to baking?

Jessica recommends that you start with something basic like a soft white sandwich bread.  You should master that basic recipe and then go from there.  Once you master it, you can make rolls, hamburger buns, and savory or sweet breads.  She says to stay away from 100% whole wheat at first because it reacts differently than white flour.


What is your opinion about using instant versus regular active dry yeast?

Essentially instant and active dry yeast are the same organism.  The difference is in how they are processed.  Jessica regularly uses both instant and active dry and does not feel that any preferential treatment is really due to either.  (Though she did point out that active dry is great for keeping septic systems healthy!)  Active dry is processed with a heat treatment and requires warm water to activate it, while instant is processed with a cooling treatment and can be mixed directly with your dry ingredients. However, rapid rise yeast is different and is not preferred to the use of either instant or active dry.


What are the goals of the King Arthur Flour demos?

The main goals are both to get out information about the products and services offered by King Arthur Flour - especially their dedication to customer support and quality, and to encourage the revival of interest in baking.  King Arthur Flour has some of the best resources to help anyone interested in any type of baking.  Their Baking Education Center in Norwich, Vermont offers both beginning and professional level classes.  They have a baking hotline and online chat to instantaneously assist in any baking dilemma, and their website is packed with tutorials, recipes, and reviews from real home-bakers.  The traveling demos are a way to bring all of this out into the community and give everyone the opportunity to participate.

For more information about dates, times, and locations of the demos:
King Arthur Flour Traveling Baking Demos


Jessica Meyers has a background in culinary art and worked as both a chef and sous chef before accepting a position with King Arthur Flour. She now is a full time instructor at the Baking Education Center. 


You can find out more about Jessica Meyers on the King Arthur Flour Website.

Sunday, November 14, 2010

Lemon Bowknots: A Sweet Yeast Bread Recipe

As I prepare to attend a free demo on sweet yeast breads with King Arthur Flour, I decided that I needed some experience with them!  So, I chose a pretty basic recipe for Lemon Bowknots that starts with a simple dough and is dressed up with style and icing (yum!). This recipe can be found in the Better Homes and Gardens: Complete Book of Baking.  It brought in rave reviews with my kind taste testers last night.


Step 1: Gather ingredients (though, my real step one was clean the crazy messy kitchen!)


Step 2: Heat Milk, Butter, and Sugar over medium heat until butter is almost melted and temperature is about 120F. 


Step 3: Mix half of the flour with the yeast, add in heated liquids and combine with your electric mixer on slow.  Then mix on high for three minutes - this really starts the yeast working.


Step 4:  Gently stir in lemon zest.


Step 5: Stir in as much of the remaining flour as you can.


Step 6: Knead 6 - 8 minutes - until dough forms a nice smooth ball (Isn't it amazing how this happens?):


Step 7: Place in an oiled bowl and cover to let rise.


The dough should double in about one hour.


Step 8: Pound down risen dough and split in half.


Step 9: Roll each half into approximately a 10 x 12 inch rectangle and cut into 1 inch wide strips.  I found that my pizza cutter did this extremely well!


Step 10: Very gently tie each strip into a loose knot.


Step 11: Arrange knots on baking sheets about 3 inches apart. And bake at 375F for 10 - 12 minutes or until golden brown.


Step 12: Let them cool on wire racks.


Step 13: Prepare icing, drizzle and enjoy!

Saturday, November 13, 2010

A Little Sweet Yeast Bread Research


Friday night, I drove home from work with a smile on my face and the entire baking section of my local public library on my passenger seat.  Yes, that is them pictured above - four whole books.  Welcome to life in a small town!

Here is what I found:

Tea Breads and Coffee Cakes by Elizabeth Alston

This book, while very sweet and cute, focuses on all cakes and quick breads.  Not much help when I want to learn about using yeast to make sweet breads.


Nancy Silverton's Breads from the La Brea Bakery by Nancy Silverton

I love this book! It is the compilation of years of baking and testing recipes.  Silverton is really obsessed as the introduction states, and includes information about almost every type of bread you can possibly imagine.  There is an extensive section on sourdough... so I have a feeling this book will be hanging out at our house for a while.  However, no real dessert or sweet breads are included.


Cook's Library: Baking Parragon Publishing

This is probably the most "general" baking book I have ever seen.  Surprisingly it is not just about breads and cakes... it is about anything you can bake from appetizers to main courses to desserts.  Not really the book I was looking for.


Better Homes and Gardens: Complete Book of Baking Editor: Shelli McConnell

I almost this one at the library and I am now glad that I didn't.  It is really the only one of the four that includes some information and recipes for sweet yeast breads.  It has a basic recipe for a Sweet Roll Dough that is used as the base for many of the other breads.  The demo I will be attending is going to teach a basic recipe like this one that can then be adjusted to suit the needs of many different recipes.  So while not the perfect reference (like the suggestion to use your microwave for yeast breads!) it is the best I have.


From this book I am going to attempt the Lemon variation of the Orange Bowknot recipe. Mmmm.. gooey lemony drizzled breads sound oh so good.  I will be sharing these with friends tonight and have the results for you soon.

Friday, November 12, 2010

A New Year

Birthday Cake - Candles
Photograph by: Jessica Diamond

Last year, I reflected on my birthday about my successes of the past year and my goals for the new.  As I look back on those sentiments, I can't help but get a little tickle in my throat.  The emotions of becoming a mother and realizing all that entails linger with me still, and I expect will continue to be true and strong for the rest of my life.

This year I look back at my goals and feel good.  I feel good that I have done what I can to accomplish the little things that make life beautiful. Things like holding close the people that I love, strengthening relationships with those I care about, and pursuing things that I love in a way that benefits our family and home life. 

As I look forward to this new year I hope to refocus myself as a wife and mother - looking to grow in those God-given rolls (and maybe learn to keep my room clean for the first time in my life - not much chance of that happening!).  I hope to find new ways to make my home welcoming to others, pursue new ways to feed my family nutritiously, and keep up with some of those crafting goals I have set for myself. 

A thank you to all of my family and friends who are ever-patient and ever-loving.  The blessings we receive in life are always so much more than we deserve.

Wednesday, November 10, 2010

What is a Sweet Yeast Bread?

Photographer: Maggie Smith

There appear to be many styles Sweet Yeast Breads.  The cinnamon roll is indeed one of my sweet husband's favorites.  The question that I have always struggled with is: why make them yourself?  Every grocery store has a whole slew of miscellaneous baked goods to indulge in (or try to avoid).  But there is just something special - dare I say sweet - about the giving and receiving of home baked treats around the holidays.  As I am one to try to avoid the "mystery ingredient" baked goods at the store, I am happy to have the opportunity to learn more about these luscious dessert breads at a free demo offered by King Arthur Flour.  The traveling demos are currently in Washington D.C. but will soon be making an appearance in the Lonestar State.  If you live near Tyler, Grapevine, Fort Worth, or Rockwall you should check them out!  I will be attending - and taking notes!

For more details on dates, times, and locations:
King Arthur Flour Traveling Baking Demos

Yes, I am plugging these events, but as they are free to all and I am not being paid (just a lowly blogger here) I figure it is ok.

Saturday, November 6, 2010

Mama Bakes Bread

One thing have been finding a lot of satisfaction in is my sourdough baking regime.  The simple weekly process of feeding, using, baking, replenishing, and enjoying our family's very own sourdough starter has been very rewarding.

A little more than two months ago, I purchased my starter from King Arthur Flour... and it has been going strong ever since.  I like knowing exactly what goes into our bread from start to finish, and I enjoy the process.  It makes me feel a little more akin to women from not that long ago that had to bake out of necessity and not just desire.  


My regime goes like this:

::Friday night:: 

Remove starter from fridge and stir.  Remove 1 cup to a medium bowl for crackers.  Add a half cup lukewarm water to the original starter and one cup of unbleached flour. Stir and let sit on the counter over night.  To the 1 cup of starter set aside stir in 1/4 cup melted butter and 1 cup whole wheat flour - knead to form a stiff dough, cover with plastic and let sit out on the counter over night or at least 7 hours.


::Saturday Morning::

Follow steps in recipe for Rustic Sourdough to add ingredients to a large bowl for bread.


I usually add 2 cups wheat and 2 cups unbleached flour.


Then I kneed in the fifth cup of flour.


Kneed until it forms a nice stretchy - not sticky - ball of dough.


I used to worry about over-kneeding, but I figure I am not good enough at it to actually have that problem.


Put dough in a lightly oiled bowl, cover and leave to rise - about 90 minutes.


While that rises, I heat up my oven and follow this recipe for sourdough crackers from Kitchen Stewardship. First rolling out half the cracker dough (I freeze the other half for another day).


I oil and season the dough, then slice with my pizza cutter and bake.


You have not had a cracker until you have had a homemade sourdough cracker....


After a while, the bread dough is ready.  Look how much it has risen!


I divide it into one loaf and usually 6 - 8 rolls.  This is the perfect amount of bread for us each week.  These need to rise one more hour.


After rising, I slick a little water on their tops, and carefully slash them.  The first time I did this, they all deflated!


After baking about 25 - 30 minutes, we have delicious bread ready for the week... and because of our yummy crackers, we are not tempted to eat it all right away!

If you have ever considered baking your own bread, I highly recommend sourdough.  It is healthy, delicious, versatile, and easily learned.

Tuesday, November 2, 2010

Lesson Learned: No Big Batch Cooking on Weeknights


I made four lasagnas tonight.  We did not eat dinner until 8:40... and the baby ended up eating leftover breakfast quiche and going to bed without dinner at all.  Will not batch cook on a weeknight again... lesson learned.

Really, it wasn't all that bad.  I have a lovely husband who watched the little one while I messed up the kitchen (and did the clean-up for me too - love him). And, I have always been one to enjoy trying new cooking methods and recipes.  While reading Real Food on a Real Budget by Stephanie Langford (great ebook and on sale right now!), I was inspired to try doubling what I cook and freezing the extra.  Then I thought - why double it when I can triple it! Great idea, right?

Hmmm. I went from deciding to do this, to shopping during my lunch break, to bringing home groceries and baby to an already dirty kitchen at 6:30pm, to breaking out every clean dish in the house and making them dirty.
  

I did not consider a few important details:
  • We only have 3 working burners on our stove.
  • My pots are not large enough to hold all that food anyway.
  • I have done zero prep.
  • I have a one year old.
  • It is 6:30 pm... and this is a very detailed recipe.
  • Tripling the recipe makes A LOT of food.... 

Delicious. Lots of Lasagna.  Lasagna Primavera from Everyday Food.


The price breakdown:

2, 30oz Ricotta $3.69 [$7.38]
2, Box Whole Wheat Lasagna Noodles $2.19 [$4.38]
1, Gallon Organic Whole Milk $5.99
5, 12oz Frozen Spinach $0.88 [$4.40]
1, 2lb Mozzarella Cheese $6.99
1, 32oz Frozen Peas $1.99
1, Pkg Organic Carrots $1.59
1, Head Garlic $0.33

On Hand:
1 cup flour
1/2 cup olive oil
Salt/Pepper

Total: $33.05 or $8.26 each for 4 home made, fabulously overflowing lasagnas.


Overflowing..... There is a positive side to all this craziness.


Please, do not reproduce any content from this site without my written permission. You can reach me directly at lonestar(dot)knits(at)yahoo(dot)com. Thank you.