Showing posts with label baking. Show all posts

Monday, August 26, 2013

Baking Day - Grainfree Style

Flourless Cheese Crackers

Grain-Free Cheese Crackers?? Yes, Please!

I began this morning seeing what everyone was up to on Facebook, and one of my friends had shared a link to a recipe for grain-free cheese cracker dough... It is a paid PDF recipe, but I had never seen anything like it, and I had to have it! I am on the look out for easy grain-free foods to send in my preschooler's lunchbox and this looked perfect, and after trying it out, I definitely recommend this Primal Dough Recipe.

New Kitchen Scale

I tested the recipe today - with my new food scale from Wal-Mart (yep. I shop there). It was less than $20.00 and suits my needs.

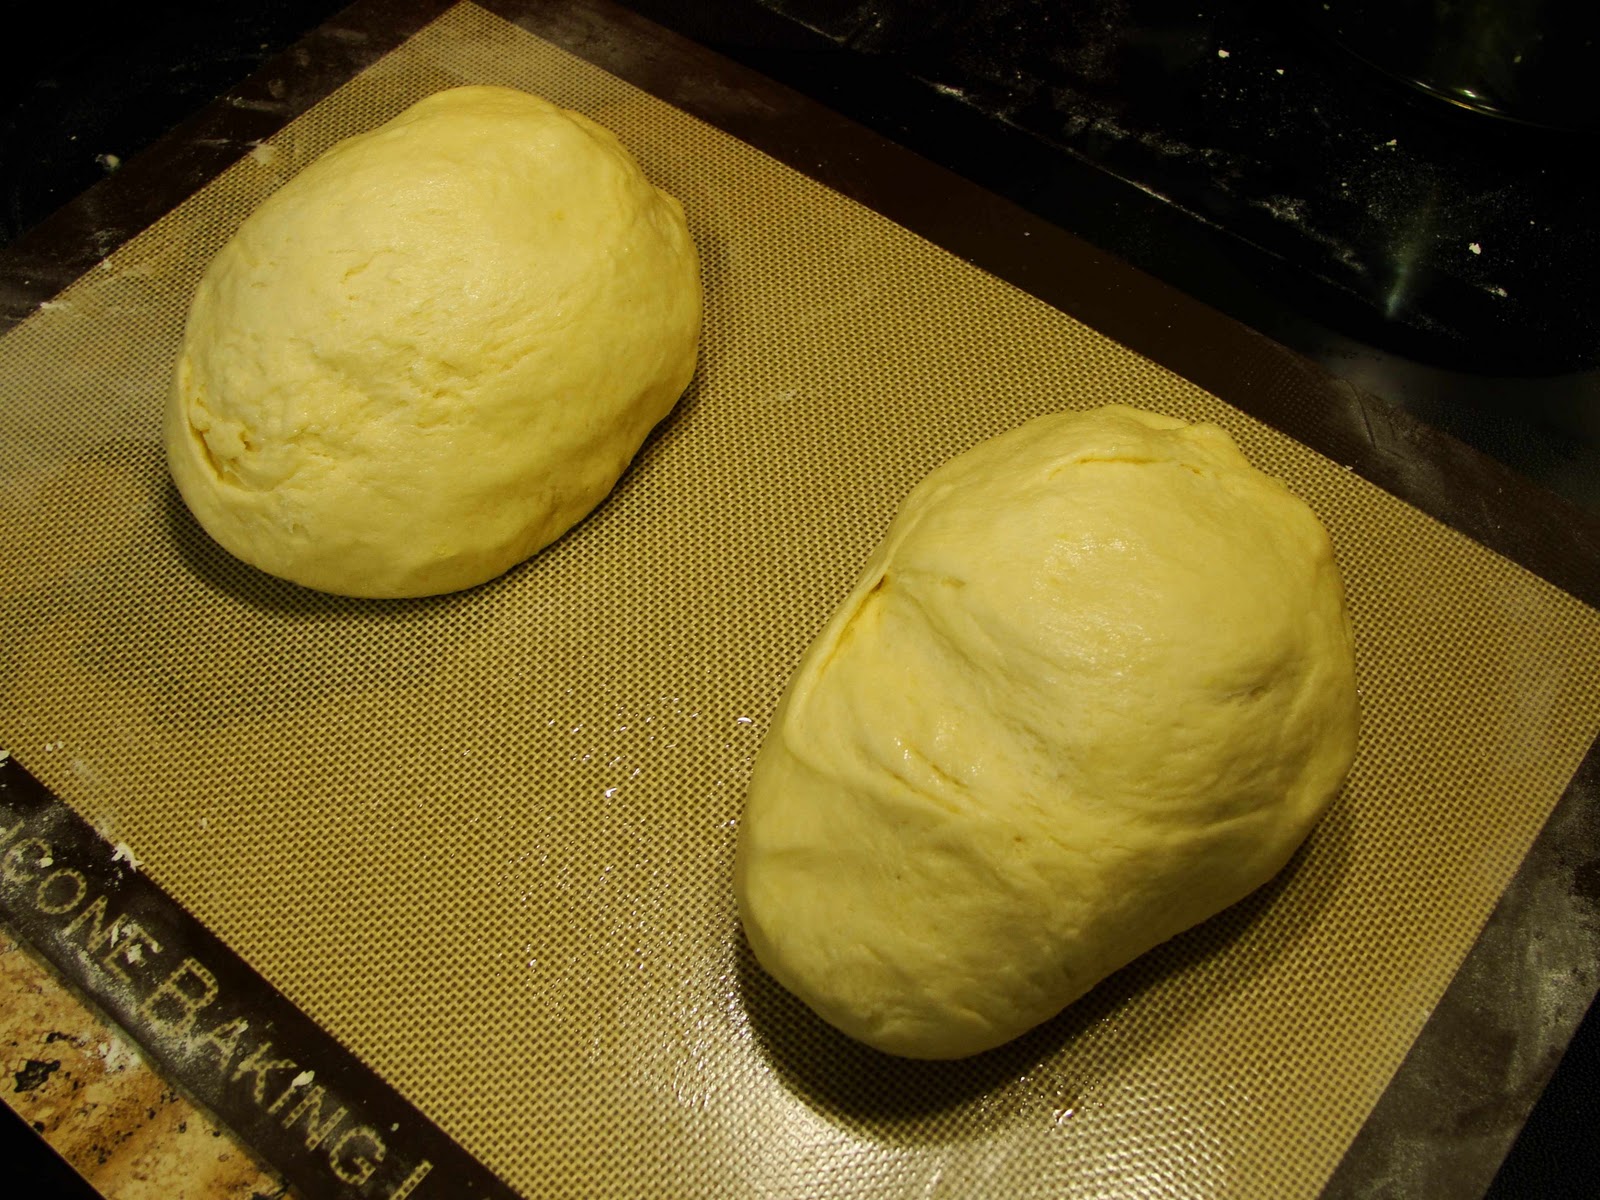
I followed the directions for the "Primal Cheese Dough" which does contain dairy products, along with tapioca flour, and root vegetables. There is also a "Paleo" version provided with dairy substitutes. I have avoided Tapioca flour in the past, but decided that as a once in a while treat for lunches, car trips, etc I'm ok with it as an ingredient - and you use quite a bit of it for this recipe.

Baking Day!

I rolled out and baked the crackers according to the instructions and they were moderately labor intensive, but not too difficult. It was fun to use my rolling pin again! (look - I baked a spaghetti squash too!) The baking takes longer than the recipe suggests as you have to break off the edge crackers and put the rest back in the oven repeatedly until they are all crisp. I found with my last batch that after I broke off the browned edge crackers, I turned off the oven and put the still slightly underdone center back in the warm oven to crisp up.

Flourless Cheese Crackers

These turned out really delicious. It is difficult not to pop them in your mouth as you break them apart. Then the real test... would the picky 4 year old eat them? I gave her a small bowl to try... asked her what she thought and she said, "they're..... yummy!"

win! It's worth the $3.95: Here's where you get the recipe. :)

Paleo Fudge

In other Paleo recipe testing, I made this Primal Fudge from Practical Paleo. I substituted peanut butter for the almond butter, and I swear... I just made a pile of Reece's Peanut Butter Cups!! They are SO GOOD.

Happy Baking!

Monday, June 18, 2012

Grain-Free Cinnamon Muffins

Occasionally, I feel like baking. And since I have been trying to limit wheat and other grains in our diet, the baking around here has been sparse lately.  However, Elana - from Elanaspantry.com - has dozens of delicious baked goods recipes that are grain-free.

Grain-Free Cinnamon Muffins

Recently I tried her Cinnamon Bun Muffins recipe to perk up our breakfast routine. They were LUSCIOUS. I will be making these again. And again. Because they are made with lots of eggs and almond flour, these protein-packed muffins really fill you up and keep you going all morning.

I made a few adjusts based on the ingredients we keep on hand, this is what I did:

Substitute all Agave for equal parts of honey.
Substitute all grapeseed oil for equal parts melted butter.

Follow Elana's mixing and baking instructions.

I did not frost our muffins, but made a little sugar glaze out of powdered sugar and milk to pour over the tops.

Try them! I know you will love them!


Wednesday, February 15, 2012

Blueberry Sour Cream Muffins

I must be in a baking mood. I go through phases, have you noticed?

Today I made up a second batch (the first batch is long gone) of the best sour cream blueberry muffin recipe I have ever tried, ever.

It is Ina Garten's Blueberry Coffee Cake Muffin recipe.

DSC04128

As always, I have edited the recipe a bit. The original makes 16 muffins and as I have one standard 12-muffin tin... that is how many I wanted to make. I followed her recipe exactly with the following measurements to make just 12 muffins:

1 stick butter
1 cup sugar
2 eggs
1 tsp vanilla
2/3 cup sour cream
1/8 + 1/16 cups milk
1 2/3 cups flour
1 1/3 tsp baking powder
1/3 tsp baking soda
1/3 tsp salt
1 cup fresh blueberries

The first batch was made with unbleached flour, and the second I made with the white whole wheat from King Arthur Flour. Both turned out lovely, though I do really like the nuttiness of the wheat!

These are real gems - enjoy!

Friday, February 3, 2012

mmmm... Peanut Butter

So, since I am trying to lose some baby weight I whipped up some delicious peanut butter cookie bars this week.

DSC04024

The great thing about these bars is that they are just peanut butter, honey, eggs, and baking soda (with a few chocolate chips thrown on top for good measure). I found the recipe when I was considering making these gluten-free brownies from Elana's Pantry (which I have made before and LOVE... thank you SIL) and noticed that her recipe had been inspired by this Peanut Butter Bar recipe from the Celiac Chicks. I am not gluten-free, but I love the idea of indulging in treats that do not contain white flour and sugar. Plus, I love peanut butter. I really do.

These definitely passed the family taste-test, even my peanut butter loving Grammy thought they were pretty yummy. And seriously, how can you go wrong with a peanut butter - honey combo?? I highly recommend putting the batter in the recommended 9x13 pan... even though it looks like you can squeeze it into a smaller one. These cookies expand big time! But, caution... these are not diet food :)


Sunday, November 6, 2011

The Banana Cream Muffin

I finished my sweater, but before I share that... I wanted to share this:

Banana Cream Muffins
DSC03701

1 cup unbleached white flour
3/4 cup whole wheat flour (I used white whole wheat)
2 tsp baking powder
1/4 tsp salt

1/3 cup sugar
1 egg
1/2 cup heavy whipping cream
1/4 cup very soft butter
2 ripe bananas

1/2 cup raisins
  • Preheat oven 400F, grease standard muffin pan
  • In a large bowl, mix together first four dry ingredients
  • In a medium bowl, gently beat together next five ingredients
  • Stir the wet ingredients into the dry just until combined
  • Gently fold in raisins
  • Spoon batter evenly into muffin cups
  • Bake 20 minutes or until golden brown and cooked through

Sunday, July 3, 2011

Baby Biscotti

Biscotti
Photo by: SheriW

This ninth month of pregnancy has me not wanting to cook or bake at all.  This is very unlike me... so as a pick me up, I made something special - Almond Biscotti.

The recipe I follow for Biscotti is from one of my favorite go-to cookbooks How to Cook Everything by Mark Bittman. I also adore his How to Cook Everything Vegetarian.


I appreciate that Mr. Bittman really does focus on the fundamentals.  These books are almost more like instructions than recipes. Each type of food is introduced with helpful information and then followed by ways of preparing, recipes, and variations of those recipes. Sample recipes are available on the website.

The biscotti recipe starts with a simple plain cookie and is followed by at least a dozen variations.  We are into almond right now - hence the almond biscotti.

Here is a link to a similar recipe at The Joy of Baking: Almond Biscotti.  Though, it calls for pre-toasting the almonds which I did not do.

Now I am ready to sit down (after the little one is in bed of course) with a nice mug of tea and a plate of freshly made biscotti to pick up my knitting needles and stitch until bedtime.

Saturday, March 19, 2011

The Return of Sweet Bread

The following photos were taken Christmas Eve (day) when I tried out the sweet braided loaf recipe from the King Arthur Flour demo. Because of normal Christmas business followed by our fun bout with the flu, I never got around to posting them.

The recipe was given out at the demo, so here is a similar recipe from kingarthurflour.com : Braided Lemon Bread.

Sweet Bread - 2

Sweet Bread - 1
Gather Ingredients, oooo look! King Arthur Flour! I love this White Whole Wheat!

Sweet Bread - 3
Here my sponge sits on the lower right, it almost grew out of the cup! And, ?, I don't remember why I had a knife in the sugar mixture.

Sweet Bread - 4
The unkneaded dough after mixing everything together.

Sweet Bread - 5
We learned at the demo that it is important to not use too much flour on your workspace - this is too much flour. Oops.

Sweet Bread - 6
The dough after kneading.

Sweet Bread - 7
Putting the kneaded dough in an oiled bowl to let rise.  I believe this is also too much oil. It has to sit about 1 1/2 hours.

Sweet Bread - 8
The risen dough.  This is where a dough rising bucket would come in handy.

Sweet Bread - 9
Mixing the cream cheese filling. This is where I realized my lemon was in a bad state and I juiced an orange in its place - turned out quite delicious.

Sweet Bread - 10
Trying to roll the dough out into a rectangle is more difficult than I imagined.

Sweet Bread - 11
Cutting the dough to make the "braid". This was my second attempt - the first was not worthy of a photo.  Filled the center with cream cheese filling and semi-sweet chocolate morsels.

Sweet Bread - 12
The braided loaf. I forgot to photograph the process of cutting the strips, this is definitely a test of your ability to visualize the desired outcome.

Sweet Bread - 13
The finished and baked loaves. These were enjoyed both Christmas Eve and Christmas Day by friends and family.  Overall it seemed more like an art project than like bread baking and was a lot of fun!

Friday, December 3, 2010

The King Arthur Flour Traveling Baking Demo


It really is a shame about bleached white flour isn't it?  That is just one of one of the many fabulous points I took away from my attendance at this evening's King Arthur Flour Demo.


 The demo was led by baking instructor Jessica Meyers and what fun is she!  She led us through a recipe for Basic Sweet Bread Dough which included the use of a sponge (a mixture of flour, water, sugar, and yeast) and yogurt (plain, vanilla, or strawberry!).  She used the dough to make a braided loaf filled with a cheese and chocolate mixture and a batch of cinnamon rolls.

Here are a few of the little gems I am taking away from the demo:

- I knead my dough way too enthusiastically, after watching Jessica I will definitely be revising my technique into more of a folding/turning method and not so much of an attack method.

- A filled and braided loaf looks easy to make and super delicious - I will be making this soon!


- Bleached white flour really is a shame.  Companys producing this flour take a less than desirable wheat and process into the mineral center of the grain in order to develope the grain's gluten and make it more desirable; however, this process makes the flour have a gray tinge and so they then bleach the flour to make it white.  The bleaching process strips the flour of any nutrients and strength it may have had and so they then have put it through another chemical treatment in order to strengthen and enrich it.  The really sad part is that this type of flour is the most widely used in store bought baked goods.  King Arthur Flour takes pride in the fact that they choose only the highest quality of wheat to make their flours and so it never goes through these chemical processes - and it has a lovely creamy natural color! 

- Be careful how you measure your flour! You don't nessesarily have to sift the flour but nomatter what - don't scoop it into your measuring cup! You should hold your measuring cup in one hand and use a scoop to shake flour into the cup then gently smooth the top.  Packing flour into the measuring cup will result in an overfloured and dry dough.

-Mmmm cinnamon rolls.  When making these you want to use egg or gelitin to create the stickiness between the layers - using a layer of melted butter will have the opposite effect and your rolls with fall apart.

Sweet hubby and I walked away from the demo with a bunch of great goodies - double the door prises with two of us there! One of the neatest was a cd compilation of ten years worth of King Artur Flour's periodical The Baking Sheet. Ten years of recipes! What fun!


All in all, a great time was had by all and I will be watching the website for next year's demo locations - hopefully there is one nearby!

Thursday, November 18, 2010

A Talk with Baking Instructor: Jessica Meyers

anadama bread
Photograph by: little blue hen


Yesterday, I had the pleasure of interviewing Jessica Meyers, one of the King Arthur Flour baking instructors who will be presenting the free demos in the North Texas area at the end of the month.  Having never really "interviewed" anyone before, I lucked out that she was friendly and personable!  


What will the average home-baker get out of these demos?

Based on information King Arthur Flour has gathered through it's website and baking hotline, many people seem to have a lot of anxiety about two things in baking: Pie Crusts and Yeast.  The demos (one about pies and the other about sweet yeast breads) will walk home-bakers and pros alike through the keys to overcoming these anxieties. Even though your grandmother made a big deal out of making sure the fat was cut into the pie crust "just right" and even though yeast is a living organism and you could possibly "kill it," Jessica says we shouldn't worry about that!

Yeast has been around for millions of years and is not as fragile as you think, and like all things pie crusts and yeast doughs just take practice to master.  In the sweet yeast bread session, the instructors teach a basic versatile dough recipe that utilizes yogurt. The demos will give you a first person look at what your doughs and crusts are supposed to look like at various stages, and really... the most difficult part of baking is learning how to wait.

Also, all you average home-bakers have the chance to win some pretty fabulous door prizes too!


What recommendations do you have for someone new to baking?

Jessica recommends that you start with something basic like a soft white sandwich bread.  You should master that basic recipe and then go from there.  Once you master it, you can make rolls, hamburger buns, and savory or sweet breads.  She says to stay away from 100% whole wheat at first because it reacts differently than white flour.


What is your opinion about using instant versus regular active dry yeast?

Essentially instant and active dry yeast are the same organism.  The difference is in how they are processed.  Jessica regularly uses both instant and active dry and does not feel that any preferential treatment is really due to either.  (Though she did point out that active dry is great for keeping septic systems healthy!)  Active dry is processed with a heat treatment and requires warm water to activate it, while instant is processed with a cooling treatment and can be mixed directly with your dry ingredients. However, rapid rise yeast is different and is not preferred to the use of either instant or active dry.


What are the goals of the King Arthur Flour demos?

The main goals are both to get out information about the products and services offered by King Arthur Flour - especially their dedication to customer support and quality, and to encourage the revival of interest in baking.  King Arthur Flour has some of the best resources to help anyone interested in any type of baking.  Their Baking Education Center in Norwich, Vermont offers both beginning and professional level classes.  They have a baking hotline and online chat to instantaneously assist in any baking dilemma, and their website is packed with tutorials, recipes, and reviews from real home-bakers.  The traveling demos are a way to bring all of this out into the community and give everyone the opportunity to participate.

For more information about dates, times, and locations of the demos:
King Arthur Flour Traveling Baking Demos


Jessica Meyers has a background in culinary art and worked as both a chef and sous chef before accepting a position with King Arthur Flour. She now is a full time instructor at the Baking Education Center. 


You can find out more about Jessica Meyers on the King Arthur Flour Website.

Sunday, November 14, 2010

Lemon Bowknots: A Sweet Yeast Bread Recipe

As I prepare to attend a free demo on sweet yeast breads with King Arthur Flour, I decided that I needed some experience with them!  So, I chose a pretty basic recipe for Lemon Bowknots that starts with a simple dough and is dressed up with style and icing (yum!). This recipe can be found in the Better Homes and Gardens: Complete Book of Baking.  It brought in rave reviews with my kind taste testers last night.


Step 1: Gather ingredients (though, my real step one was clean the crazy messy kitchen!)


Step 2: Heat Milk, Butter, and Sugar over medium heat until butter is almost melted and temperature is about 120F. 


Step 3: Mix half of the flour with the yeast, add in heated liquids and combine with your electric mixer on slow.  Then mix on high for three minutes - this really starts the yeast working.


Step 4:  Gently stir in lemon zest.


Step 5: Stir in as much of the remaining flour as you can.


Step 6: Knead 6 - 8 minutes - until dough forms a nice smooth ball (Isn't it amazing how this happens?):


Step 7: Place in an oiled bowl and cover to let rise.


The dough should double in about one hour.


Step 8: Pound down risen dough and split in half.


Step 9: Roll each half into approximately a 10 x 12 inch rectangle and cut into 1 inch wide strips.  I found that my pizza cutter did this extremely well!


Step 10: Very gently tie each strip into a loose knot.


Step 11: Arrange knots on baking sheets about 3 inches apart. And bake at 375F for 10 - 12 minutes or until golden brown.


Step 12: Let them cool on wire racks.


Step 13: Prepare icing, drizzle and enjoy!

Please, do not reproduce any content from this site without my written permission. You can reach me directly at lonestar(dot)knits(at)yahoo(dot)com. Thank you.