Tuesday, July 31, 2012

Let the Games Begin!

This year I decided to participate in the "Ravellenic Games" (which was once know by the name Ravelympics.... until the US Olympic Committee decided to be lame).

The goal is to challenge yourself by starting and finishing one or more projects during the course of the Olympic games. There are 32 official "events" from the "Afghan Marathon" to the "WIPs (Works in Progress) Wresting".

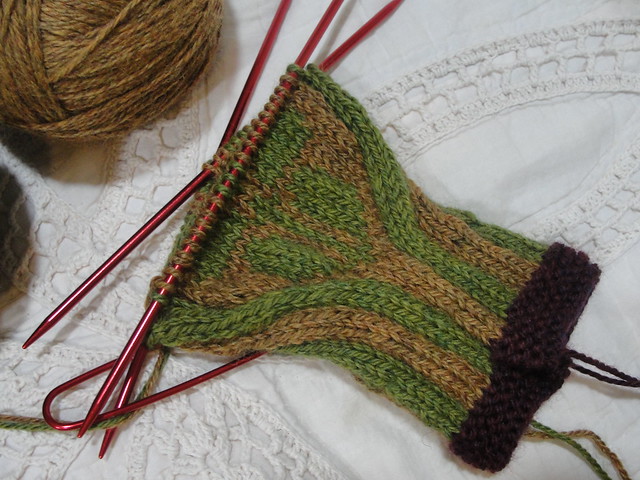
I am participating in the "Mitten Medley" and double challenging myself with some (ack!) colorwork! I am knitting a pattern I purchased and downloaded directly from Ravelry: The Blomst Mittens. I love the country-retro feel!

Blomst Mittens 1
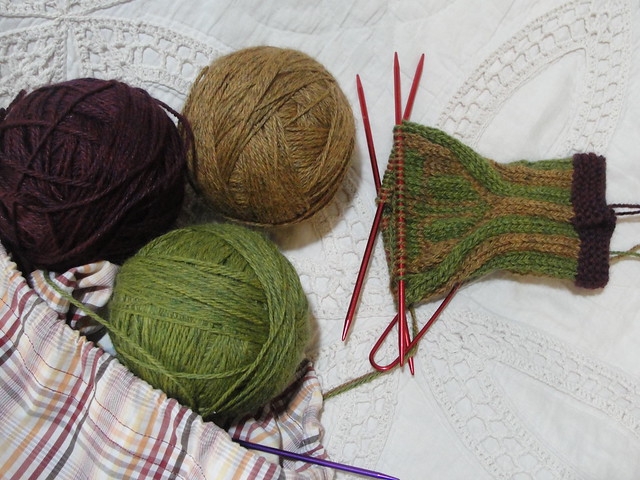
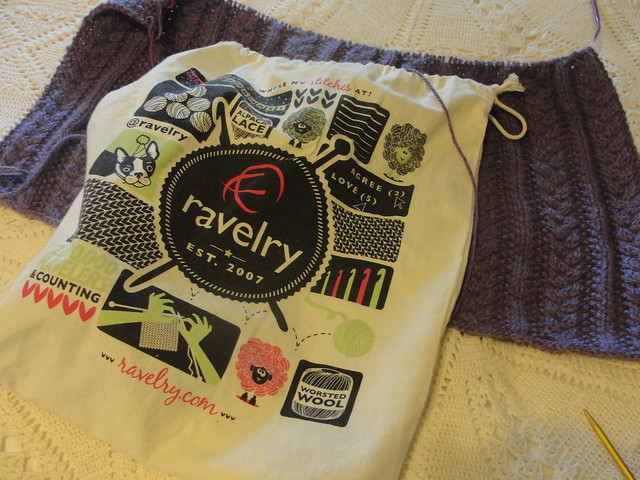
This is my project so far - I started Saturday - I really loved these colors together in the hank, but now that I am knitting them I wish the purple was more red-orange and than the gold was more beige-tan. The green does not pop like I wanted it too, and the purple just looks out of place.... however, I will keep knitting away in hopes that they will grow on me.

Blomst Mittens 4
The long-term plan for these mittens is to knit them in a variety of color combinations and gift them out to aunts and sisters. The yarn (Berroco Vintage DK) is super soft and comes in a lot of lovely colors so I think I will buy a couple different colors to try out with the leftovers from this pair.


Monday, July 30, 2012

Sew a Project Bag out of a Man's Shirt!

Shirt Bag 7
Last week I made this great project bag out of one of David's old shirts! Shirting fabric is perfect for project bags... it is strong and smooth so it is gentle on your yarn.

Shirt Bag 1
1. Pick out your shirt! I like the rusty colors in this one, and the plaid is very nice for helping cut and sew straight lines.

Shirt Bag 2
2. Decide how long/tall you want your bag.  Keep in mind that you will be folding over the top edge for the drawstring, and you will need some space for seaming at the bottom. I cut mine about 18 inches long, next time I will make it 16 or 17.

Shirt Bag 4
3. I just used the width from the button band to the edge (less cutting and finishing!). This shirt has the little split at the bottom edge (see the fold?). I just use that for the drawstring casing!

Shirt Bag 8

Shirt Bag 5
4. Remove the buttons, with the right sides facing, sew the side and bottom seams (seam allowance doesn't really matter). Then fold over the top (what was the bottom edge of the shirt) and sew it down to make the drawstring casing. I made my drawstring out of a crocheted chain of dishcloth cotton. I also zigzagged any raw edges inside the bag.

Shirt Bag 6
Yay! It's not very fancy, but it works - and I'm going to make more!

Thursday, July 26, 2012

Sweater #6: The Baby Kimono

Deanna's Baby Kimono 3

Welcome sweater #6! Earlier this week I finished up this little gem.  I even used the "correct" method for sewing up my seams (ugh! seaming!). The pattern is the Miss Sadie Baby Kimono, a free download on Ravelry. The yarn is humble Hobby Lobby Snowflake Wool Blend. I love the orange-purple combination, and I think I have enough yarn left to make a little matching hat.

Deanna's Baby Kimono 11

Clare graciously modeled - the sizing is 3 to 6 months... so it is a little snug on almost 12 month old Clare!! I can't believe it has been almost a year. I really liked this pattern, the fit is really sweet. It would make a nice boyish sweater as well - in the right yarn and with a couple manly buttons.

Deanna's Baby Kimono 12

My little doll in her butterfly jammies... she poses brilliantly next to the dog food pail, doesn't she? :)

In other knitting news, I have been getting into knitting podcasts - mainly "Knitting in Circles" with Aimee and Darren. I might have to knit myself some socks...

Stay tuned, sweater #7 will be here soon!

Thursday, July 12, 2012

On My Needles: 3 Lovely Sweaters

I can never work on just one project. I just can't. Nope. Never.

I have come to accept this.

Fresh off the needles and ready to be sewn up:
Deanna's Baby Kimono 1
Deanna's Baby Kimono

I received this orange and purple yarn from a friend on Ravelry, and was waiting for the perfect project. After hearing that a childhood friend was expecting her first little girl this coming fall I immediately wanted to knit this for her. The pattern is a free download on Ravelry: Miss Sadie Baby Kimono. It is a wonderful pattern for beginners, and I hope to use it when teaching a small group of new knitters soon, however, it leaves a lot for the knitter to fill in on their own, so I plan to rewrite the pattern as an "exploded" version with lots of details and specifics to help out the newbies.

Next, for a sweet niece:
Libby Sweater 1
My purple Libby Sweater by Leslie Friend - whose blog name "a Friend to knit with" is genius and I wish I was half as creative!

Front and Back are done... working on the sleeves now.
Libby Sweater 3

Lastly, I have made a bit more progress on Helen's Fall Sweater:
2012 Helens Fall Sweater
Can you see the error I made early on and left for character purposes of course?! I am very proud of this first REAL cable project. This is knit in Berroco Vintage - I LOVE THIS YARN!!!! It is squishy, wonderful, and machine washable - and you don't have to sell a kidney in order to afford it.

Oh, and.... I got an awesome, AWESOME Ravelry Bag! They were all sold out on the very first day!
2012 Helens Fall Sweater & Ravelry Bag
It makes me feel like a real Ravelry groupie!

Tuesday, July 10, 2012

Flower Girls and Birthday Cakes

The end of June was busy, busy, busy. Helen's birthday followed by my younger sister's wedding all in one week. There was a lot of car-knitting as we drove around Texas for all the festivities, but at home I was busy with celebrating and crafting.

For Helen, she requested a "Magical Pony" Birthday Cake and I tried my best.  I am not a fancy cake decorator, but it is fun to try! I looked up "My Little Pony" cakes online then, after being overwhelmed by the awesomeness made by other people, decided to simplify with a sheet cake and colored icing. I printed this my little pony picture and drew it onto the white iced cake with purple and pink icing in Ziploc baggies that had a bottom tip snipped off.

Homemade My Little Pony Birthday Cake 1

We also bought clearance birthday hats as Helen is obsessed with "party hats". I wasn't too happy with the design, so I did some more printing, a little coloring and cutting, and tada - customized magic pony hats!

My Little Pony Birthday Hats 5

My Little Pony Birthday Hats 1
My beautiful birthday girl!

For the wedding, I needed to finish the restyled flower girl dress with a few ribbon roses. I looked up a few tutorials online, but they all seemed overly complicated and not what I was looking for. So, I just took needle and thread (and lots of fray-check) and winged it... I think they turned out pretty nice:

Restyled Flower Girl Final Dress 4

Restyled Flower Girl Final Dress 1
My beautiful flower girls waiting for the wedding to begin. 


Please, do not reproduce any content from this site without my written permission. You can reach me directly at lonestar(dot)knits(at)yahoo(dot)com. Thank you.