Sunday, December 26, 2010

Knit: Doll Cape

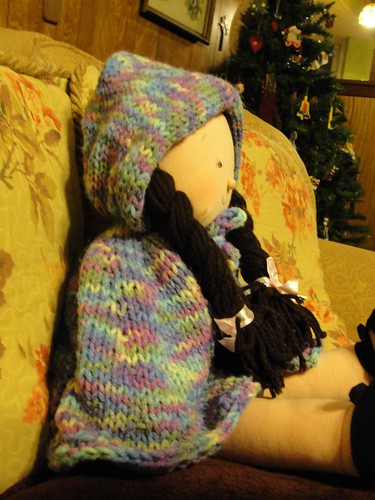
This cape was whipped up as a Christmas gift this year for a lovely niece who loves her AmericanGirl doll.

Cape - 2

It is made with leftover yarn from this vest project and from a free pattern on Ravelry.

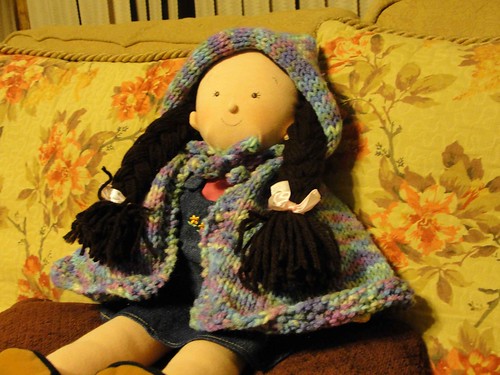
Cape - 4

Snug, warm, and ready for the holidays.  Like my model? She is a birthday gift for Helen... it is a little early, but she was just so sweet I had to have her!

Tuesday, December 21, 2010

Research: Cloth Diapers

Sunny Diapers


Is there anything more tedious than cloth diapers??  Many people would put up a good argument against that!  I have been in the thick of research lately about using cloth mainly for economic reasons - it really is just plain cheaper (depending on how you do it anyways!).  We now have built up enough of a size large stash to start diapering our 18 month old on the weekends and I am really excited to give it a try.

I wanted to share some of my research and resources with you (though, please take into consideration that we have not used cloth yet - except for that one night after bath time when we decided to stick baby in a cloth diaper to just "see what happens" and of course, 5 minutes later we had a present waiting for us!)

Great websites and articles with information about using cloth diapers:

Green Mountain Diapers
Ravelry Cloth Diaper Group
SimpleMom.net: 4 Cloth Diapering Choices Defined
SimpleMom.net: The 411 behind Cloth Diapering 101
SewMamaSew: Diaper Sewing 101
KeeperoftheHome: Healing Rashes While Cloth Diapering

Great websites for purchasing cloth diapers:

Craigslist - This is the place to go to look for an awesome deal, many people purchase a size small stash of diapers then when they are ready to buy a larger size sell them to fund the next purchase.  This is an especially good place to look for newborn diapers since there is usually a lot of them to be had and many cloth diapering moms also breastfeed which means no stains on used diapers!

Green Mountain Diapers - This site is home to the web's most loved prefold diapers.  They have a great philosophy and a wide variety of diapers - all cotton - which the site owner says is really the best material for diapers.

Ebay - For similar reasons as Craigslist, however you will meet more "business" sellers.

Kelly's Closet - I have used this site twice and both times left with a free diaper!  They regularly have promotions where if you purchase a certain dollar amount's worth you get a free one-size diaper.

"Special Buy" Sites - This is sites like Ecobabybuys, Greenbabybargains, and Babyhalfoff.  If you keep checking back each day you are sure to find an occasional great deal on cloth diapers.  I recently purchased a 6 pack of Large All-In-One Fuzzibuns for about $60!

More Cloth Diapers to Come!
- Our Cloth Diaper Plan and the Cost Analysis
- The "For-Real" Test Run: The Cloth Diaper Experiment
- Wool Diaper Covers: Research Post
- More Diapering Links in the Family Room

Do you have any great Cloth Diaper Resources? Please share!


Tuesday, December 14, 2010

Knit for Helen: A Giant Sweater

I have many new knitting projects on my docket.  Too many really - but it is no fun to have too few!  After working up Helen's Stocking, I had a lot of the blue yarn leftover that I used for the centers of the snowflakes and it was starting to get pretty cold here in Texas. 


I like to stock up on seasonal clothes in early Fall and Spring at the Just Between Friends consignment sales.  A friend and I always go to the last day "half-off" sale and get a great deal on everything!  This Fall I made a point to buying tons of long-sleeved t-shirts for Helen.  It really doesn't get too cold here, so I thought the two or three sweaters we had were enough.


We keep our house pretty cool, and I noticed that I was always bundled up in a sweater - so obviously baby needs sweaters too - and two or three really doesn't cut it for someone who thinks it is fun to wear her food! So, I decided to knit her a sweater out of my leftover yarn and not being one for checking gauge - it is huge! It will probably fit her next winter too, so that is not a bad thing.

The pattern I am following is the Fair Isle Top (Ravelry Link) from Debbie Bliss' Special Knits: 22 Gorgeous Handknits for Babies and Toddlers. I am too chicken to attempt the Fair Isle in the pattern, so I have substituted a simple stripe pattern - but it looks nice, and I love the picot edging - so sweet!

The back is complete, the front partially done, and I am hoping to finish it all up before Christmas.  It will make a nice little homemade gift for my little one.

Tuesday, December 7, 2010

How I Make Yogurt

I have made yogurt before, but this time I took photos through the process. The main instructions I follow can be found at Small Notebook.


1. I gather my supplies: milk, and individual sized plain yogurt with active cultures, mason jars, my large stainless steel rimmed bowl, a large pot (you could use a double boiler), stainless steel spoon, and liquid thermometer (borrowed from hubbies coffee supplies). Make sure everything is good and clean.

2. I fill the large pot with as much water as I can and still have the bowl sit comfortably on top.  Place this on the stove over high heat.

Did I mention that I got this milk for $2.99! I love the manager special!! 
It is perfect for yogurt making!

3. Pour a half gallon (2 quarts) of milk into the bowl and occasionally (about every 3-5 minutes) stir and check the temperature.


4. Split the individual yogurt between the mason jars (I am using two large jars).  Set aside.


5. Let the milk reach 180F and then take it off to cool.  You can use an ice bath to help it cool faster, however I never seem to have ice in the house.


6. Once it cools to 110F, put a small amount in each jar with the yogurt and stir (this tempers the yogurt).  Then fill the jars and cover.


8. Put the jars somewhere that they can stay pretty warm for about 7 to 9 hours.  Some people use a cooler, yogurt maker, crock pot, etc.  I am not sure how these methods work though I have links to some of them on my "In the Kitchen" page if you are interested.  I use the good old fashioned "stick them in the oven with the oven light on" method. It works just fine for me.

Please ignore the very dirty oven.

9. After approximately 7 - 9 hours, remove the yogurt from the warm place, stir, and put in the back of the fridge to cool.  The longer you let your yogurt sit the more sour the taste of the finished product.  I like mine to sit between 7 to 8 hours.  Don't be alarmed if you see tiny green "lights"or "sparkles" in yogurt when you stir... those are just your little friends and they will go to sleep when cooled.

10. After completely cooled, enjoy! Mix in your favorite combo of sweeteners and fruit or use for smoothies.  It is also good as a sour cream substitute and babies love it!
Friday, December 3, 2010

The King Arthur Flour Traveling Baking Demo


It really is a shame about bleached white flour isn't it?  That is just one of one of the many fabulous points I took away from my attendance at this evening's King Arthur Flour Demo.


 The demo was led by baking instructor Jessica Meyers and what fun is she!  She led us through a recipe for Basic Sweet Bread Dough which included the use of a sponge (a mixture of flour, water, sugar, and yeast) and yogurt (plain, vanilla, or strawberry!).  She used the dough to make a braided loaf filled with a cheese and chocolate mixture and a batch of cinnamon rolls.

Here are a few of the little gems I am taking away from the demo:

- I knead my dough way too enthusiastically, after watching Jessica I will definitely be revising my technique into more of a folding/turning method and not so much of an attack method.

- A filled and braided loaf looks easy to make and super delicious - I will be making this soon!


- Bleached white flour really is a shame.  Companys producing this flour take a less than desirable wheat and process into the mineral center of the grain in order to develope the grain's gluten and make it more desirable; however, this process makes the flour have a gray tinge and so they then bleach the flour to make it white.  The bleaching process strips the flour of any nutrients and strength it may have had and so they then have put it through another chemical treatment in order to strengthen and enrich it.  The really sad part is that this type of flour is the most widely used in store bought baked goods.  King Arthur Flour takes pride in the fact that they choose only the highest quality of wheat to make their flours and so it never goes through these chemical processes - and it has a lovely creamy natural color! 

- Be careful how you measure your flour! You don't nessesarily have to sift the flour but nomatter what - don't scoop it into your measuring cup! You should hold your measuring cup in one hand and use a scoop to shake flour into the cup then gently smooth the top.  Packing flour into the measuring cup will result in an overfloured and dry dough.

-Mmmm cinnamon rolls.  When making these you want to use egg or gelitin to create the stickiness between the layers - using a layer of melted butter will have the opposite effect and your rolls with fall apart.

Sweet hubby and I walked away from the demo with a bunch of great goodies - double the door prises with two of us there! One of the neatest was a cd compilation of ten years worth of King Artur Flour's periodical The Baking Sheet. Ten years of recipes! What fun!


All in all, a great time was had by all and I will be watching the website for next year's demo locations - hopefully there is one nearby!
Please, do not reproduce any content from this site without my written permission. You can reach me directly at lonestar(dot)knits(at)yahoo(dot)com. Thank you.